As the long, hot days of summer begin to fade, something magical happens in the garden. The air cools, the soil stays moist longer, and everything feels just a bit calmer.
For me, fall gardening has become one of the most satisfying parts of the growing season.
Over the years, I’ve discovered a few favorite vegetables that not only thrive in the fall—but actually prefer it. If you’ve never planted a fall garden before, these are great crops to start with.
They’re reliable, delicious, and surprisingly low-maintenance.
1. Spinach: The Cool-Weather Superstar
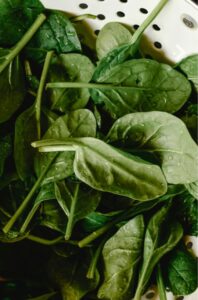
Why this leafy green deserves a starring role in your fall garden
When it comes to fall gardening, few crops are as reliable, nutritious, and easy to grow as spinach. Often overlooked in favor of flashier vegetables, spinach quietly thrives when the weather turns cool—and it rewards you with fast growth, rich flavor, and endless versatility in the kitchen.
If you’re looking for a no-fuss crop that works in both small spaces and full-sized garden beds, spinach is your go-to green. Here’s why I consider it the true superstar of the cool season.
Why Spinach Loves Cool Weather
Spinach isn’t a fan of the heat. In fact, warm weather can cause it to “bolt” (go to seed), making the leaves bitter and the plant unusable for harvest.
That’s why fall (and early spring) is the perfect time to grow it. The cooler temperatures slow down bolting and encourage tender, flavorful leaves.
I typically start sowing seeds in late summer or early fall—about 6 to 8 weeks before my area’s first frost. Spinach seeds germinate well in soil that’s around 50–70°F (10–21°C), making it ideal for the transition from summer to autumn.
How to Grow Spinach in Fall
Here’s how I’ve had the most success with spinach in my fall garden:
1. Pick the Right Variety
Some popular fall varieties include:
-
Bloomsdale Long Standing – great texture and flavor
-
Space – slow to bolt, high-yield
-
Winter Bloomsdale – perfect for overwintering in cold climates
2. Prepare the Soil
Spinach prefers rich, well-drained soil with plenty of organic matter. Before planting, I mix in compost and rake the surface smooth.
3. Sow Seeds Directly
Spinach doesn’t like to be transplanted. I sow seeds directly into the soil about ½ inch deep and 2 inches apart. Once they sprout, I thin them to 4–6 inches apart for optimal growth.
4. Keep It Moist
Water gently and consistently, especially during the first couple of weeks after planting. I mulch around the plants to retain moisture and reduce weeds.
Cold-Hardy and Frost-Tolerant
One of the things I love most about spinach is how well it handles frost. Not only can it survive light freezes, but the flavor often improves after a touch of cold.
The plant increases its sugar content to protect itself from freezing, which results in sweeter, more tender leaves for you.
In milder climates, I’ve even had spinach overwinter and bounce back in spring. A little row cover or light mulch is all it takes to protect it from harsh conditions.
How I Use Spinach from the Garden
Spinach is one of the most versatile greens in my kitchen. I use it for:
-
Fresh salads with fall apples and walnuts
-
Sautéed side dishes with garlic and olive oil
-
Adding greens to soups and stews
-
Blending into smoothies for a nutrition boost
-
Stirring into pasta, eggs, or rice bowls
A bonus? It’s incredibly nutrient-dense—loaded with iron, fiber, vitamins A, C, and K, and antioxidants.
2. Carrots: Sweet and Worth the Wait
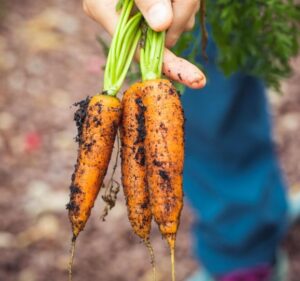
There’s nothing quite like pulling a fresh carrot from the soil—dusty, vibrant, and full of flavor. It’s a moment of satisfaction that comes only after a bit of patience.
Carrots aren’t the fastest-growing vegetable in the garden, but in the fall, they become something special.
The cooler weather transforms their flavor, and the crisp autumn soil makes harvesting feel like a small treasure hunt.
If you’re planning a fall garden, carrots are a must-grow. Here’s why they deserve a spot in your beds, and how to grow them successfully.
Why Carrots Shine in Fall
While carrots can be grown almost any time during the growing season, they really come into their own in the fall.
As temperatures drop, carrots naturally convert starches into sugars to protect themselves from frost. This makes them taste noticeably sweeter and richer than their summer counterparts.
Cool soil also improves their texture, and fewer garden pests are around to nibble on your hard-earned harvest. Plus, fall-grown carrots tend to store better and can even be left in the ground into early winter if the soil doesn’t freeze solid.
How to Grow Carrots in Fall
Growing carrots does take a little care, but once you get the hang of it, they’re wonderfully low-maintenance. Here’s how I plant and care for my fall carrots:
1. Timing is Everything
To get a full harvest before your first hard frost, count backward from your average frost date using your carrot variety’s “days to maturity” (usually 60–80 days). For many regions, that means planting in late July through early September.
2. Choose the Right Variety
Some of my favorite fall carrot varieties include:
-
Nantes – sweet, crisp, and fast-growing
-
Chantenay – short and stout; great for heavy soils
-
Danvers – a reliable, classic variety
-
Sugarsnax or Bolero – known for extra sweetness and cold tolerance
3. Prepare the Soil Well
Carrots need loose, well-drained soil free of rocks or clumps. I usually sift my garden bed or add extra compost to ensure the roots can grow straight and long. Avoid high-nitrogen fertilizers—they can cause carrots to fork or grow hairy.
4. Sow Thinly and Keep Moist
Carrot seeds are tiny, so I sow them shallowly (about ¼ inch deep) and water gently. Consistent moisture is key—if the soil dries out during germination, the seeds may fail to sprout. I often cover the row with a light board or burlap until I see green.
5. Thin for Success
Once the seedlings are a couple of inches tall, I thin them to about 1–2 inches apart. It’s tedious, but essential for growing full-sized roots.
Frost Is Your Friend
Here’s one of the best-kept secrets of carrot growing: a light frost actually improves the taste. As night temperatures dip, carrots develop more sugar, resulting in a noticeably sweeter harvest. I usually wait until after the first frost to start pulling mine—it’s worth the wait!
In milder regions, I’ve even left carrots in the ground through December, covering them with a layer of straw to protect from deep freezes. They keep beautifully that way and taste amazing.
From Garden to Table
Homegrown carrots are incredibly versatile. Here’s how I use them:
-
Roasted with olive oil and herbs
-
Shredded fresh into salads or slaws
-
Blended into soups and stews
-
Carrot fries baked with paprika and garlic
-
Juiced with apples and ginger for a sweet, healthy drink
The taste is noticeably better than store-bought—earthy, sweet, and far more flavorful.
3. Broccoli: Strong and Steady
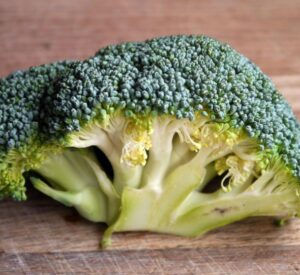
Why this cool-season classic deserves a spot in your fall garden
Broccoli may not be the flashiest vegetable in the garden, but it’s definitely one of the most dependable.
In the unpredictable world of gardening—where weather, pests, and timing can throw off even your best efforts—broccoli stands strong. It’s a cool-weather crop that actually prefers the chill of fall, making it one of my go-to vegetables for autumn planting.
If you’re looking for a hardy, nutrient-packed, and rewarding crop, broccoli is the kind of steady performer every fall garden needs.
Why Broccoli Loves Fall
Broccoli is built for the cool season. While it can be grown in spring, fall-grown broccoli tends to have better flavor, tighter heads, and fewer problems with pests like cabbage worms. The cooler the weather, the better it performs—and a touch of frost can even enhance its taste.
In hot summer conditions, broccoli can bolt (go to flower) quickly, making it bitter or unusable. But in fall, the plant has time to mature slowly and properly without stress, producing larger and denser heads.
How to Grow Broccoli in the Fall
Here’s how I’ve had the most success growing broccoli during the cooler months:
1. Start with the Right Timing
Broccoli can take 60–100 days to mature depending on the variety, so I start seeds indoors in midsummer and transplant seedlings outdoors about 6–8 weeks before the first expected frost. If you’re short on time, purchasing young starts from a garden center can help you get a head start.
2. Choose a Reliable Variety
Some of the best fall broccoli varieties include:
-
Green Magic – heat-tolerant and early maturing
-
Calabrese – a traditional Italian heirloom with large heads
-
Belstar – known for consistency and great flavor
-
Arcadia – very cold-tolerant and excellent for fall
3. Transplant and Space Correctly
I transplant broccoli seedlings into nutrient-rich soil, spacing them about 18–24 inches apart. They love compost and benefit from some nitrogen-rich fertilizer early on.
4. Water Consistently
Broccoli likes moist, but not soggy, soil. I keep the soil evenly moist—especially important during head formation—using mulch to help retain moisture and regulate soil temperature.
Pest Pressure Is Lower in Fall
One of my favorite reasons to grow broccoli in fall: fewer bugs! Pests like cabbage worms, aphids, and flea beetles are far less active in cooler weather. While I still check leaves regularly and use row covers early on, I rarely have to fight off the same level of infestation I see in spring or summer plantings.
How I Use Broccoli in the Kitchen
Once harvested, broccoli is endlessly versatile. I’ve used it in:
-
Roasted veggie trays with olive oil and garlic
-
Stir-fries with soy sauce and ginger
-
Creamy broccoli soups
-
Steamed with lemon and butter
-
Broccoli quiche or pasta dishes
The homegrown version tastes richer and more tender than what you find in the store. And bonus—if you leave the plant in the ground after cutting the main head, many varieties will produce small side shoots that can be harvested for weeks!
Quick Tips for Broccoli Success
-
Start early enough to beat the frost with a full-sized head.
-
Cover young plants with row covers to protect from late-summer pests.
-
Feed your plants with compost or organic fertilizer during early growth.
-
Harvest heads while they’re tight and compact for the best taste.
-
Don’t pull the plant after harvest—watch for side shoots.
4.Arugula: Fast, Flavorful, and Fun
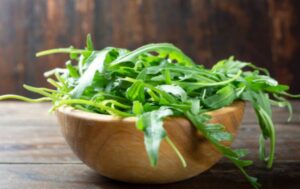
Why this peppery green is a must-have in your fall garden
If you’re looking for a leafy green that grows fast, packs a punch, and thrives in the cool of fall—look no further than arugula.
Sometimes called rocket or roquette, arugula is one of my favorite crops to grow during autumn. It’s low-maintenance, quick to mature, and brings bold flavor to salads, sandwiches, and more.
Whether you’re a beginner gardener or just want a fast-growing green to fill in gaps, arugula delivers. Here’s why it’s such a standout in the fall garden.
Why Arugula Thrives in Fall
Arugula loves cool weather. It germinates quickly in lower temperatures, often sprouting in just 4–7 days. Unlike in the heat of summer, when arugula tends to bolt (go to flower) and turn bitter, fall-grown arugula stays tender and tasty for much longer.
The shorter days and crisp air help slow its growth just enough to give you a steady supply of leaves without the urgency of rapid bolting.
How to Grow Arugula in Fall
One of the best things about arugula is how easy it is to grow. It doesn’t need much space, fuss, or special treatment. Here’s how I plant and care for mine:
1. Direct Sow in Late Summer or Early Fall
I typically scatter arugula seeds directly in the garden starting in late August or early September. It grows so quickly that I can often get multiple harvests from a single planting—or sow a new batch every 2–3 weeks for a steady supply.
2. No Need to Transplant
Arugula doesn’t like to be moved, so it’s best to direct sow. Loosen the soil, sprinkle the seeds about ¼ inch deep, and lightly cover with soil or compost. Water gently and keep the soil moist.
3. Harvest Early and Often
Once the leaves are 2–3 inches long (usually within 3–4 weeks), I start harvesting. You can snip individual leaves or cut the whole plant about an inch above the soil to encourage regrowth. This “cut-and-come-again” method makes arugula perfect for small gardens or raised beds.
Bonus: Fewer Pests in Fall
Flea beetles love arugula in the spring, but in fall, I’ve noticed far fewer pest issues. Still, I keep row covers handy during the first few weeks just in case. Once the plants are established, they tend to hold up well without much intervention.
In the Kitchen: Big Flavor, Endless Uses
What makes arugula so special is its flavor—peppery, slightly spicy, and totally unique. A little goes a long way, and it’s perfect for adding zip to dishes. Some of my favorite ways to use it include:
-
Tossed fresh in salads with apple or pear
-
Layered on sandwiches or burgers
-
Mixed into pasta with lemon and parmesan
-
Blended into pesto for a zesty twist
-
Lightly wilted in soups or on pizzas
5.Garlic: The Fall Garden Essential
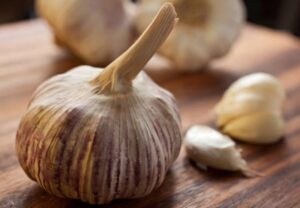
Why planting garlic in autumn brings big rewards next summer
When it comes to fall planting, garlic is one of the smartest and most satisfying choices you can make. It’s low-maintenance, cold-hardy, and best of all—once it’s in the ground, it practically takes care of itself.
You won’t harvest it until next summer, but the wait is more than worth it. There’s just something extra satisfying about pulling up your own homegrown bulbs, full of flavor and far better than anything you’ll find in a store.
If you’ve never planted garlic before, fall is the perfect time to start. Here’s why it works, how to grow it, and everything you need to know for a successful harvest.
Why Garlic Loves to Be Planted in Fall
Unlike most vegetables, garlic isn’t planted in spring—it’s planted in the fall and harvested the following summer.
That’s because garlic needs a cold period (called vernalization) to properly develop large, flavorful bulbs. Planting in fall gives the garlic time to establish roots before the ground freezes, then rest over winter and take off in early spring.
Planting garlic in fall also frees up your garden space in spring for faster-growing crops, making it a smart long-term investment in your growing cycle.
Softneck vs. Hardneck Garlic: What’s the Difference?
Before planting, it helps to know the two main types of garlic:
• Hardneck Garlic
-
Grows well in colder climates
-
Produces scapes (edible flower stalks) in late spring
-
Often has stronger flavor and larger cloves
-
Doesn’t store as long as softneck varieties
• Softneck Garlic
-
Grows best in milder climates
-
Doesn’t produce scapes
-
Usually has more but smaller cloves
-
Excellent for long-term storage
Choose the type that fits your climate and storage needs. If you’re unsure, try planting both to see which works best in your garden.
How to Plant Garlic in Fall
Here’s my tried-and-true process for planting garlic:
1. Choose Quality Seed Garlic
Don’t use grocery store garlic—it may be treated to prevent sprouting and could carry disease. Instead, buy seed garlic from a local nursery or trusted supplier. Break the bulb into individual cloves just before planting.
2. Prep the Soil
Garlic likes rich, well-drained soil with good organic matter. I mix in compost and a little bone meal or aged manure before planting.
3. Plant the Cloves
-
Plant each clove pointy side up, about 2 inches deep and 4–6 inches apart.
-
Rows should be spaced about 12 inches apart.
-
Water thoroughly after planting.
4. Mulch Generously
Cover the bed with a thick layer of mulch (like straw, shredded leaves, or grass clippings) to protect against cold, suppress weeds, and retain moisture.
Winter Care and Spring Growth
In most climates, garlic will go dormant in winter. Don’t worry if you don’t see any growth until early spring—that’s normal. Once the weather warms up, garlic greens will shoot up fast.
In spring, I remove some of the mulch, weed carefully, and give the plants a side dressing of compost or organic fertilizer. Keep the bed well-watered until the tops begin to yellow in early summer.
Harvesting and Curing Garlic
By mid to late summer, the lower leaves of the garlic plant will begin to dry out. That’s your cue that it’s time to harvest.
-
Use a garden fork to gently lift the bulbs from the soil (don’t pull by the greens).
-
Brush off excess dirt, but don’t wash them.
-
Cure the garlic by hanging it in a cool, dry, shady spot with good air circulation for 2–3 weeks.
-
Once fully dry, trim the roots and tops, and store bulbs in a cool, dark place.
Properly cured, softneck garlic can last up to 9 months, while hardneck varieties usually store for 3–6 months.
Why Homegrown Garlic is So Worth It
There’s a noticeable difference in flavor between store-bought and homegrown garlic. It’s sharper, richer, and more aromatic—perfect for roasting, sautéing, or using raw in dressings and marinades.
And don’t forget about garlic scapes if you grow hardneck varieties—they’re delicious in pesto, stir-fries, and more.
FAQs About Fall Vegetable Gardens
1. When should I start planting vegetables for a fall garden?
Most fall vegetables should be planted 6–10 weeks before your first expected frost date. In many regions, this means starting in late summer to early fall (August through early October). Root crops and leafy greens generally need more time than fast-growing salad greens.
2. What vegetables grow best in the fall?
Fall is perfect for cool-season crops such as:
-
Leafy Greens: Spinach, lettuce, kale, arugula, Swiss chard
-
Root Crops: Carrots, beets, radishes, turnips
-
Brassicas: Broccoli, cauliflower, cabbage, Brussels sprouts
-
Others: Garlic (planted in fall for next summer), peas, green onions
3. Can I grow vegetables in containers during fall?
Yes! Many fall vegetables grow well in containers—especially lettuce, spinach, arugula, radishes, and green onions. Just be sure the containers are deep enough, have drainage holes, and are placed in an area with 6+ hours of sunlight.
4. How do I protect fall crops from early frosts?
Use row covers, cold frames, or garden fabric (frost cloth) to shield young plants. Mulching around roots can also help insulate soil. Some hardy crops, like kale and carrots, can survive light frosts and even taste better afterward.
5. Is the soil still good for planting in fall?
Absolutely. Fall soil often retains more moisture and is less compacted than summer soil. However, it’s a good idea to add compost or organic fertilizer before planting to refresh nutrients.
6. How often should I water fall vegetables?
Water as needed—usually once or twice per week, depending on rainfall. Cooler temps reduce evaporation, but it’s still important to keep soil consistently moist, especially during seed germination.
7. Can I grow fall vegetables in warm climates (zones 8–10)?
Yes! In warm climates, fall is often a second spring, with mild temperatures ideal for greens, brassicas, and root veggies. In these areas, you can even plant into November or December.
8. How do I know when to harvest fall vegetables?
Each crop has different cues, but in general:
-
Leafy greens: Harvest when leaves are big enough to eat
-
Root crops: Check size by gently pulling one (carrots, beets, etc.)
-
Brassicas: Heads should be firm and full
Pay attention to maturity dates and keep a garden journal to track timing.
9. Can I grow from seeds, or should I use transplants?
Both work, depending on your timing:
-
Use transplants for slower crops like broccoli or cauliflower if starting late.
-
Use seeds for faster growers like lettuce, radishes, and arugula.
10. Are fall vegetable gardens less work than spring gardens?
In many ways—yes!
-
Fewer weeds
-
Fewer pests and diseases
-
Cooler weather means more comfortable gardening
Fall gardens are often lower maintenance and more forgiving, making them great for busy or beginner gardeners.