You’ve spent the afternoon wandering through sunlit rows of apple trees, handpicking the most beautiful fruit you can find—only to get home and discover… half your harvest is bruised. Heartbreaking, right?
The truth is, apples are far more delicate than they look, and even the smallest bump can turn a crisp bite into a mushy disappointment. But with the right picking techniques and a few insider tips, you can keep your apples just as perfect as the moment they left the tree.
Before you head to the orchard, here’s how to make sure every apple you bring home stays fresh, flawless, and bruise-free.
Step 1: Start with the Right Apples
A bruise-free harvest starts before you even touch the fruit. Choosing the right apples means you’re already halfway to keeping your bounty perfect.
What to look for:
-
Firmness: Gently cup the apple in your palm and press very lightly with your fingertips. It should feel firm, never soft or spongy.
-
Skin condition: The skin should be smooth, free from cracks, insect holes, or brown sunken spots. Any mark on the outside can mean damage beneath the surface.
-
Color maturity: Depending on the variety, ripe apples will have a rich, even color. For example, Honeycrisps should be bright red with hints of yellow, while Granny Smiths are a consistent deep green. Pale or dull patches often mean the apple isn’t ready yet.
What to avoid:
-
Apples with obvious bruises or dents. Even small blemishes can worsen quickly.
-
Fruit that has fallen to the ground (“windfalls”). These often have hidden bruises and can carry bacteria.
-
Overripe apples that detach with the slightest touch—they may have begun softening already.
Step 2: Master the Gentle Twist-and-Lift Technique
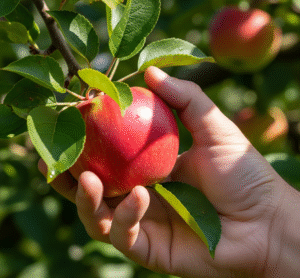
Once you’ve found the perfect apple, the way you remove it from the tree will determine whether it stays flawless or ends up with bruises, stem breaks, or invisible pressure marks that show up later.
Apples aren’t just hanging loosely—they’re attached by a stem to a tiny spur on the branch. That spur is precious: it contains buds that will produce next year’s flowers and fruit. Pulling or yanking can break the spur and damage the tree’s ability to fruit in the future.
Plus, a rough pull can send the apple swinging into the branch, leaving a bruise before it even reaches your basket.
Here’s the orchard-approved technique:
-
Cup the apple gently in your palm, letting it rest fully in your hand instead of gripping it with fingertips. (Fingertip pressure can cause small dents that ripen faster.)
-
Lift the apple upward, toward the branch above, instead of pulling down. This changes the angle of the stem and helps it release more naturally.
-
Give a slow, gentle twist until you feel a soft “pop” as the stem detaches.
-
Catch the apple in your hand—don’t let it fall into the basket. Even a short drop can bruise it.
Extra Tips for Damage-Free Picking:
-
Use both hands when possible—one to support the branch, one to pick the apple—especially if the branch is heavy with fruit.
-
Avoid twisting too aggressively; you’re not unscrewing a jar lid. Over-twisting can pull bark or damage the spur.
-
Never shake the tree to dislodge fruit—it causes multiple apples to fall, bruise, and spoil faster.
-
If you’re picking with kids, show them slowly—children tend to tug hard, so teaching the twist early saves fruit and trees.
Why this matters:
-
Preserves the tree for future harvests.
-
Keeps the apple’s skin intact, reducing the risk of rot.
-
Prevents chain reactions—one bad tug can send several apples tumbling to the ground.
Step 3: Handle Apples Like Eggs
Even if you’ve picked the perfect apple with flawless technique, the work isn’t over—how you handle it after it’s off the tree can make or break its condition. Apples bruise surprisingly easily, especially when they’re fully ripe and their flesh is crisp yet delicate. A single careless drop into a basket can leave an invisible dent that turns into a brown spot within hours.
Think of each apple as if it were an egg—strong enough to hold, but fragile enough to damage with the wrong movement.
Here’s how to handle apples to keep them bruise-free:
1. Place, Don’t Drop
Never let apples fall into your basket or bag, even from a short distance. Instead, set each one down gently. This reduces impact damage and prevents pressure points from forming.
2. Use Soft Containers
-
Opt for cloth bags, padded baskets, or lined totes rather than hard plastic buckets or cardboard boxes.
-
If using a traditional basket, line it with a towel or soft cloth to create a cushion.
3. Don’t Overfill
-
A deep pile of apples means the ones at the bottom will bear the weight of all the others.
-
Fill containers only halfway, then switch to a fresh one.
-
Bring several smaller bags instead of one large one—it’s better for the apples and easier to carry.
4. Avoid Jostling
Carry your apples carefully on your hip or with both hands instead of letting them swing in a bag. If you’re using a wagon or stroller to transport them, make sure the container is secured so it doesn’t slide or bounce.
5. Separate the Perfect from the Bruised
If you accidentally pick or drop an apple that gets bruised, store it separately from your perfect ones. Bruised apples release ethylene gas faster, which speeds up ripening—and spoiling—of everything around them.
Pro Tips from the Orchard:
-
If you’re picking with children, give them their own small, lightweight basket to reduce accidental drops.
-
In hot weather, keep apples shaded in your bag or under a blanket to prevent heat stress, which softens the skin and makes bruising easier.
-
Check your apples every 20–30 minutes and redistribute them if needed to prevent stacking pressure.
Step 4: Pick from the Outside In
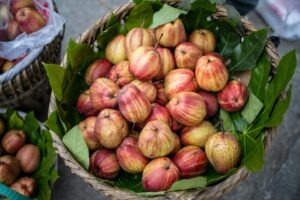
When you approach a tree heavy with apples, it’s tempting to go straight for the biggest, shiniest fruit in the middle. But rushing in can cause you to bump, scrape, or even knock other apples to the ground—damaging them before they ever make it to your basket.
The safest way to harvest is to work methodically from the outside branches inward. This keeps you from reaching awkwardly over other apples, avoids jostling the tree unnecessarily, and reduces accidental bruising.
Why Outside-In Works
-
Ripeness patterns: Apples on the outer branches ripen first because they get more sunlight. Picking these first ensures you get the best fruit without disturbing less ripe ones.
-
Less bumping: By starting at the edges, you clear a “path” so you can move inward without brushing against apples still on the tree.
-
Better visibility: You can see each apple clearly, making it easier to avoid picking ones with blemishes or hidden damage.
How to Do It Right
-
Stand close to the branch you’re working on so you don’t have to stretch or lean.
-
Pick the apples closest to you first, working along the branch.
-
Once a section is clear, step in slightly and move toward the trunk.
-
Always keep your basket or bag close to hip height so you can place apples gently without dropping them.
Extra Care Tips
-
Avoid brushing apples against each other or against the basket when placing them inside—skin-on-skin friction can cause tiny scuff marks that become soft spots.
-
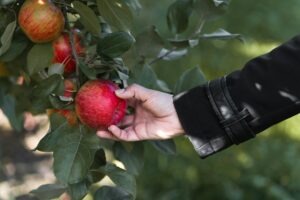
Mind your sleeves and jewelry—zippers, watch faces, and even shirt buttons can scratch apple skins.
-
If you need to reach into the center of the tree, use one hand to gently move leaves or branches aside while picking with the other to prevent knocking fruit loose.
Pro Tip: If you notice a branch loaded with apples, pick from the heaviest side first—this reduces strain on the branch and lowers the chance of other apples falling and bruising.
Step 5: Avoid Climbing and Stretching Too Far
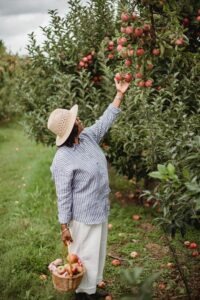
Climbing into trees or stretching awkwardly for that “perfect” apple often causes more harm than good—both to you and the fruit. Not only does overreaching increase the risk of losing your balance, but it also leads to accidental shaking of the branch, causing nearby apples to fall and bruise on impact.
Why It Matters
-
Safety first: Orchard ground can be uneven, and a fall from even a short height can cause injury.
-
Fruit protection: Every unnecessary jolt to the branch can send multiple apples tumbling to the ground, shortening their shelf life.
-
Better harvest quality: Apples that stay on the tree until you’re ready to pick them remain pristine, while fallen ones may already be damaged before you notice.
Better Alternatives to Stretching or Climbing
-
Use a picking pole or fruit picker — These tools have a small basket with soft lining at the end, allowing you to twist and catch apples without letting them drop.
-
Bring a sturdy step ladder — Only if the orchard allows it. Make sure it’s on even ground and have someone hold it steady.
-
Wait for staff assistance — Many orchards have tall-reach tools or ladders available and are happy to help retrieve those top-tier apples.
-
Work from a better angle — Sometimes, simply walking around the tree reveals a reachable side for the same apple.
Safe Picking Technique for High Fruit
-
Position yourself so you’re facing the apple directly, rather than reaching sideways.
-
Twist the apple gently (like turning a doorknob) to loosen the stem.
-
If using a ladder, keep both feet firmly on one rung—never stand on the top step.
-
If using a fruit picker, don’t overfill the basket—empty it after each apple to avoid bruises from fruit knocking into each other.
Extra Care Tip
If an apple does fall, set it aside in a separate “immediate use” pile. Even if it looks perfect, the bruise may develop in a day or two, so these are best eaten or cooked first.
Final Step: Store with Care for Lasting Freshness
Even if you’ve picked every apple perfectly, the way you store them will decide whether they stay crisp for weeks—or soften and bruise within days. Apples are living fruit, and they continue to breathe and release ethylene gas after harvest, which can speed up ripening if stored improperly.
Why Storage Matters
-
Prevents bruising in transit and at home
-
Keeps apples crisp and flavorful for weeks or months
-
Reduces waste so you enjoy your hard-earned harvest longer
How to Store Apples the Right Way
-
Separate by quality – Keep the firmest, blemish-free apples for long-term storage, and place any with slight imperfections in a “use first” pile.
-
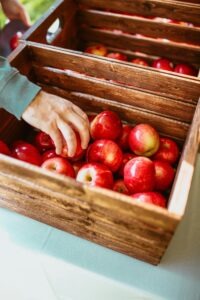
Choose the right container – Use shallow, breathable crates or boxes lined with soft paper or cloth. Avoid deep buckets or bags where weight from the top apples can bruise the bottom ones.
-
Avoid stacking too high – Limit to two or three layers at most. Place padding between layers if needed.
-
Keep them cool and slightly humid – Ideal storage is around 30–35°F (–1–2°C) with 90–95% humidity. A cool basement, garage, or fridge crisper drawer works well.
-
Don’t mix with other produce – Especially bananas or pears, which release high amounts of ethylene gas and will make apples ripen faster.
Pro Tip for Extra Freshness
Wrap each apple individually in newspaper or tissue paper before storing. This not only cushions them but also contains any rot or mold if one apple spoils, preventing it from affecting the others.
FAQs: All About Picking & Protecting Your Apples
1. Why do apples bruise so easily?
Apples have a thin skin and soft flesh beneath, which makes them prone to internal damage even from light pressure or drops. Bruising breaks down the cell walls, leading to brown spots and quicker spoilage.
2. Should I twist or pull apples from the tree?
Always twist gently upward instead of pulling straight down. This keeps the stem intact (helping the apple last longer) and avoids damaging nearby fruit or branches.
3. How do I carry apples in the orchard without bruising them?
Use a shallow basket or cloth-lined bag. Avoid plastic bags or deep containers where apples pile up and press against each other.
4. Can bruised apples still be eaten?
Yes, if the bruise is small and the rest of the apple is firm, you can cut around it. However, bruised areas spoil faster, so eat them soon or use them for cooking.
5. What’s the best way to store apples after picking?
Keep them cool (30–35°F / –1–2°C) and humid (90–95%). Store in shallow crates, and avoid stacking them too high. For extra protection, wrap each apple individually in paper.
6. How long will handpicked apples last?
With proper storage, some varieties (like Fuji or Granny Smith) can last 2–6 months. Softer apples (like McIntosh) usually keep for 4–6 weeks.
7. Should apples be washed before storing?
No—washing before storage can remove the natural protective coating and add moisture, which encourages rot. Wash only right before eating.
8. Can I store apples with other fruits?
It’s best not to. Fruits like bananas and pears release ethylene gas, which makes apples ripen and spoil faster.